Are you tired of the outdated wallpaper in your home but worried about damaging the plaster underneath? In this comprehensive guide, we will walk you through the step-by-step process of safely stripping wallpaper without causing any harm to your walls. From preparing the room and testing for asbestos to using alternative methods like steamers and removal gels, we’ve got you covered. Say goodbye to those old walls and hello to a fresh new look without the stress of damaging your plaster.
Why Strip Wallpaper?
Stripping wallpaper is a crucial step in home renovation projects as it ensures a smooth surface for new paint or wallpaper, eliminates the risk of wallpaper adhesive causing future complications, and allows DIY enthusiasts to take full control of their home decor.
By removing outdated wallpaper, homeowners create a blank canvas for any desired design scheme. This process also enhances the durability and longevity of the walls, preventing potential issues like bubbling or peeling paint in the future. Eliminating old wallpaper adhesive residue ensures a better bond for new wall treatments, promoting a professional finish. Engaging in a DIY wallpaper removal project can be not only fulfilling but also cost-effective, offering a sense of accomplishment and a personalized touch to the home decor.
Discover: How Much Does Plastering A Wall Cost
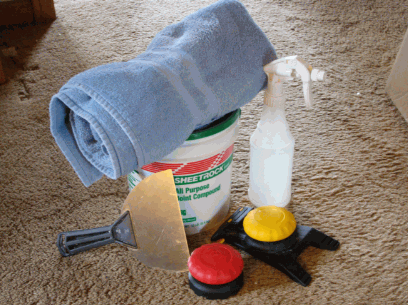
What Tools Do You Need?
To effectively remove wallpaper, you need specific tools like a scraper, scoring tool, wallpaper steamer, and wallpaper stripper to ensure a smooth and efficient process.
Each tool plays a crucial role in simplifying the wallpaper removal task. The scraper is perfect for gently lifting and peeling off stubborn wallpaper layers. A scoring tool creates small holes in the wallpaper, allowing the removal solution to penetrate and loosen the adhesive.
The wallpaper steamer emits steam that effectively softens the adhesive, making it easier to remove large sections of wallpaper. On the other hand, a wallpaper stripper includes a solution that further loosens the stubborn adhesive for easier removal.
You can find these essential tools at home improvement stores like Lowe’s, where a wide range of quality options is available to meet your wallpaper removal needs efficiently.
Step-By-Step Guide To Stripping Wallpaper
Removing wallpaper can be a daunting task, but with a systematic step-by-step guide, you’ll be able to tackle the job with confidence and achieve professional results, ensuring that every bit of adhesive and old wallpaper is effectively removed.
Prepare The Room
Before starting the wallpaper removal process, it’s crucial to prepare the room by removing electrical outlet covers and switch plates to protect them from water and adhesive solutions, ensuring a safe and efficient DIY project.
Safeguarding the floors and furniture is equally important to prevent any damage during the process. Protective materials such as drop cloths or plastic sheets should be placed strategically to cover the entire floor area and any nearby furniture that cannot be moved out of the room. This precaution will also make the cleanup process much easier once the wallpaper removal is complete. Turning off electrical outlets as a safety measure is essential to avoid any potential hazards caused by water near live electricity sources.
Remove Furniture And Cover Surfaces
To begin stripping wallpaper, start by removing all furniture from the room and covering surfaces with drop cloths or plastic sheeting to prevent any damage from water or adhesive solutions.
Before you start the stripping process, ensure that all delicate items like lamps, vases, or decorative pieces are carefully taken out of the room. This will not only protect them from accidental damage but also make your job easier.
When using plastic sheeting, make sure it is tightly secured with painter’s tape to avoid any potential slippage or movements that could expose your flooring or furniture to water and chemicals.
Along with protecting your surfaces, drop cloths can also absorb excess water and adhesive residue, simplifying the cleanup process once you’re done with the wallpaper removal.
Test For Asbestos
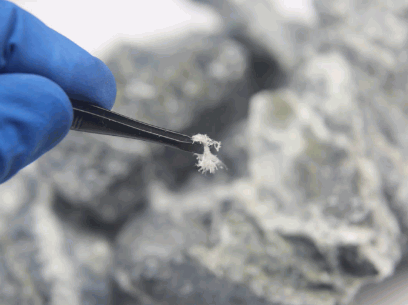
Before you proceed with wallpaper removal, it’s essential to test for asbestos in older homes to ensure a safe and healthy environment during your DIY project.
Asbestos was a common building material used in homes constructed before the 1980s, prized for its fire-resistant and insulating properties. It poses serious health risks when disturbed, releasing toxic fibers into the air.
To test for asbestos, you can purchase DIY testing kits or hire a professional asbestos inspector. These specialists use specialized equipment to take samples and analyze them in accredited laboratories.
If asbestos is found, it’s crucial to take immediate action to minimize exposure. Consult with asbestos removal professionals who can safely contain or remove the hazardous materials following strict regulations and guidelines. Properly managing asbestos is essential to safeguarding the health of you and your loved ones.
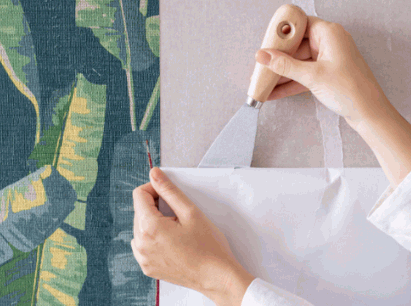
Score The Wallpaper
Using a scoring tool, gently score the wallpaper in small sections to allow adhesive-removing solutions to penetrate and loosen the wallpaper for easier removal.
Scoring the wallpaper is a crucial step in the removal process as it creates pathways for the solvent to reach the adhesive underneath. The most common types of scoring tools include handheld scoring tools and scoring wheels that perforate the wallpaper without causing damage to the wall underneath. Each tool has its advantages, with handheld tools providing more control and precision while scoring wheels are faster for larger areas.
It’s important to adjust the pressure and angle of the scoring tool based on the type of wallpaper you are working with. Vinyl wallpaper, for example, may require a lighter touch to avoid damaging the surface, while thicker, more textured wallpapers may need deeper scores to ensure the solvent can penetrate efficiently.
Apply Wallpaper Stripper
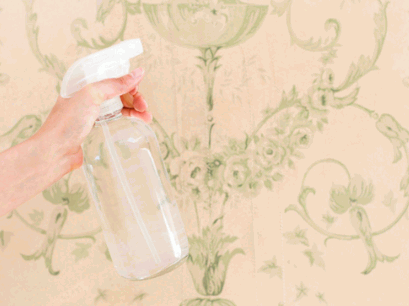
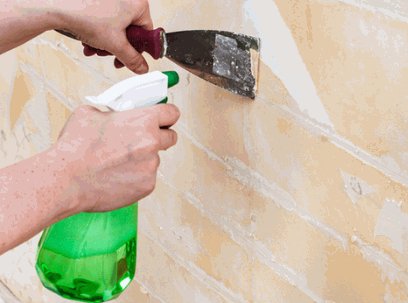
Apply a wallpaper stripper solution or a DIY mix of hot water, vinegar, and fabric softener to the scored sections to break down the wallpaper adhesive, making it easier to peel off.
Before starting the application, ensure the wallpaper is scored adequately to allow the solution to seep through and soften the adhesive effectively. Mix one part vinegar or fabric softener with three parts hot water in a spray bottle for a cost-effective and environmentally friendly solution. Ensure to shake the bottle well to mix the ingredients thoroughly.
Begin spraying the solution generously on the wallpaper surface, focusing on one section at a time to avoid drying out before it has a chance to work. Use a wallpaper scraper or putty knife to gently lift the softened wallpaper from the edges, taking care not to damage the underlying wall surface.
Let The Stripper Sit
Allow the wallpaper stripper to sit for the recommended time on the packaging to effectively dissolve the adhesive, making it easier to remove the wallpaper in large sections.
While the exact time may vary depending on the product, most wallpaper strippers typically require around 15-30 minutes to work their magic. It’s crucial to adhere to the suggested timeframe as it ensures that the stripper penetrates deep enough to weaken the adhesive bond adequately.
To know if the wallpaper stripper is ready for action, keep a close eye on the surface. Look for signs such as the paper starting to bubble or lift at the edges, indicating that the adhesive underneath is breaking down. This visual cue lets you know that the stripper has had enough time to do its job effectively.
This crucial step significantly boosts the efficiency of the wallpaper removal process by softening the adhesive and loosening the bond between the paper and the wall. By allowing the stripper ample time to work, you’ll save yourself from unnecessary effort and frustration when it comes to peeling off the wallpaper in clean, large sections.
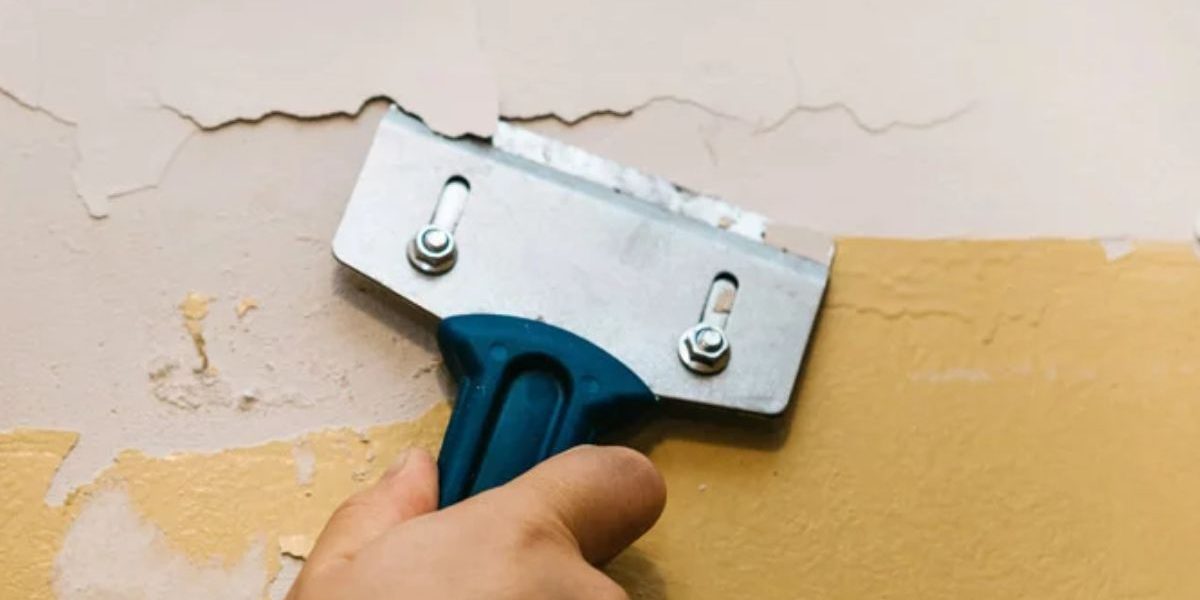
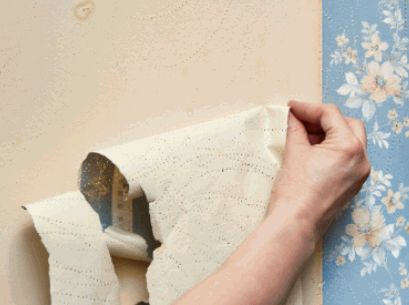
Start Peeling The Wallpaper
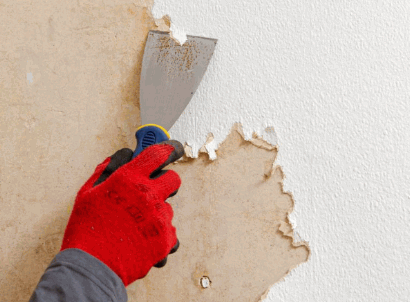
Begin peeling the wallpaper from the wall starting at the seams, using a scraper to gently lift and remove the paper without damaging the underlying surface.
For stubborn areas that are hard to remove, consider using a solution of warm water and a bit of vinegar or a commercial wallpaper removal product to help loosen the adhesive.
It’s crucial to be patient and avoid rushing the process to prevent unnecessary wall damage. Gently working in small sections and allowing enough time for the solvent to penetrate will make the peeling process smoother.
Remove Stubborn Areas
For stubborn areas where wallpaper won’t easily come off, use a wallpaper steamer or a Piranha brand adhesive remover to loosen the adhesive and make removal easier.
Wallpaper removal can be a daunting task, but with the right tools and techniques, you can tackle even the most stubborn areas. When using a wallpaper steamer, start by filling the reservoir with water and allowing the machine to heat up. Hold the steam plate against the wallpaper for a few seconds to soften the adhesive, then gently scrape the paper off with a putty knife or scraper.
If you prefer using an adhesive remover, make sure to follow the manufacturer’s instructions carefully to avoid damaging the walls. Apply the remover to a small section of the wallpaper, wait for it to penetrate the adhesive, and then begin scraping off the softened paper.
It’s important to work slowly and patiently to prevent any wall damage. If you encounter particularly stubborn patches, you can try a combination of steam and adhesive remover for better results. By using these tools and techniques wisely, you can effectively remove wallpaper without causing unnecessary harm to your walls.
Clean The Walls
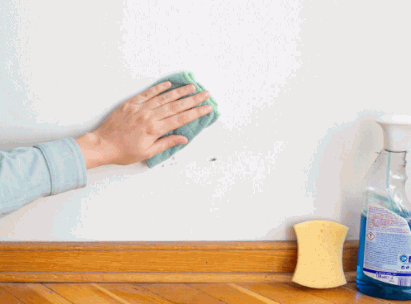
After all the wallpaper is removed, clean the walls thoroughly with hot water to remove any remaining wallpaper glue and prepare the surface for new paint or wallpaper.
Once you have finished removing the wallpaper, it’s crucial to ensure that the walls are completely clean and free of any residue. Removing all leftover adhesives is essential as it can interfere with the adhesion of new paint or wallpaper. To achieve a smooth and pristine surface, consider using a mild detergent mixed with water to scrub away any stubborn glue remnants. Rinsing the walls with clean water and allowing them to dry completely will help in achieving a clean canvas for your next decorating project.
What Are The Alternative Methods?
While the traditional method of removing wallpaper involves water and chemical strippers, there are several alternative methods that can be just as effective, such as using a wallpaper steamer or a specialized wallpaper removal gel.
Using A Steamer
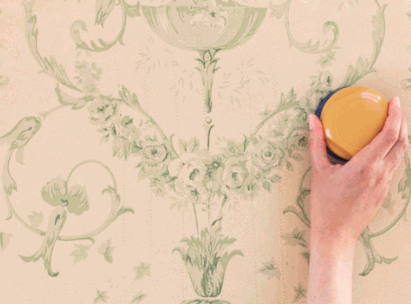
Using a wallpaper steamer, you can effectively remove wallpaper by applying hot steam to loosen the adhesive, making it easier to peel off.
When using a wallpaper steamer, first fill the reservoir with water and allow the machine to heat up. Once the steam starts to flow, hold the steamer against the wallpaper for a few seconds. The steam penetrates the wallpaper, softening the adhesive underneath. This process makes the wallpaper easier to remove without damaging the walls. One of the key benefits of using steam is that it is a gentle method that doesn’t require harsh chemicals or excessive elbow grease.
Steam is particularly effective in breaking down stubborn adhesives, saving you time and effort. It is also a safer alternative compared to traditional methods that involve scraping or using chemical solvents.
To ensure safety while using a wallpaper steamer, wear protective gloves and goggles to shield your skin and eyes from hot steam. Make sure the steamer is securely plugged in and placed on a stable surface. Always follow the manufacturer’s instructions for safe usage and avoid overexposing yourself to the steam.

Using A Wallpaper Removal Gel
Wallpaper removal gels are an effective DIY solution that works by penetrating the wallpaper and breaking down the adhesive, allowing for easy removal.
One of the main advantages of using wallpaper removal gels is that they are relatively easy to use and do not require extensive preparation. To apply the gel, start by scoring the wallpaper gently to allow the gel to penetrate. Then, generously apply the gel using a brush or roller, making sure to cover the entire surface evenly.
After letting the gel sit for the recommended amount of time, which is usually indicated on the product instructions, you can start removing the wallpaper. The gel should have loosened the adhesive, making the removal process much smoother.
When removing the wallpaper, you can use a scraper or putty knife to lift the paper gently. If the wallpaper is particularly stubborn, you may need to reapply the gel and let it sit for a bit longer before attempting to remove it.
How To Prevent Damage To Plaster?
Preventing damage to plaster walls during wallpaper removal is crucial to maintain the integrity of your walls and ensure a smooth surface for future painting or wallpapering.
Be Gentle
When removing wallpaper from plaster walls, it’s important to be gentle to avoid chipping or damaging the plaster surface.
If the wallpaper has been on the walls for a long time, it may require a bit more patience to remove without causing harm. One effective method is to use a mixture of warm water and a gentle dish soap to soften the adhesive before carefully peeling off the layers. Another helpful tip is to use a plastic scraper or a gentle sponge to avoid scratching the delicate plaster underneath. Taking your time and working in small sections can also make the process smoother and less likely to cause damage.
Use A Scraper
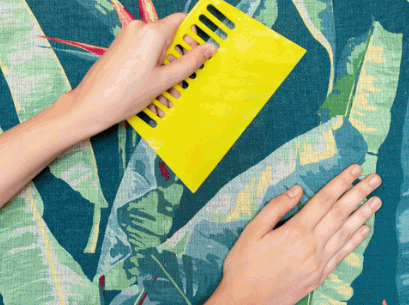
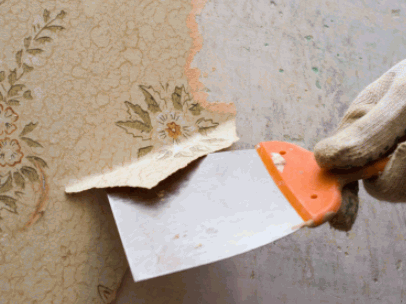
Using a scraper with a flexible blade can help remove wallpaper without causing damage to plaster walls, especially when dealing with stubborn adhesive.
In terms of choosing a scraper for plaster walls, there are a few different types that work well. The most common ones include putty knives, paint scrapers, and drywall knives. Putty knives are ideal for smaller areas or delicate work, while paint scrapers are great for larger sections. Drywall knives, on the other hand, have a wider blade that can cover more surface area in one swipe.
- To use a scraper effectively, start by loosening the wallpaper with a steamer or solution, then gently slide the scraper beneath the paper and push it upwards in a horizontal motion. This technique helps lift the paper without damaging the underlying plaster.
- When scraping, be sure to work in small sections and test different angles to find the most effective approach. Avoid applying too much pressure, as this can lead to gouging or chipping off the plaster surface.
For stubborn areas, consider using a stripping gel or enzyme-based remover to soften the adhesive before using the scraper. This can make the process easier and less likely to cause damage.
Repair Any Damaged Areas
If any damage occurs during wallpaper removal, it’s essential to repair the affected areas of plaster walls before applying new paint or wallpaper.
One common technique for repairing damaged plaster is to first assess the extent of the damage by checking for cracks, holes, or loose areas. Once identified, the next step involves gathering the necessary materials which typically include plaster mix, joint compound, sandpaper, a putty knife, primer, and paint.
- Start by cleaning the damaged area to remove any debris or loose plaster.
- Apply the plaster mix or joint compound to fill in the cracks or holes, ensuring a smooth and even surface.
- After it dries, sand the repaired area to achieve a seamless finish, then apply primer before painting or wallpapering.
Prime The Walls
Priming the walls after wallpaper removal and repairs is crucial to prepare the plaster surface for a new coat of paint or wallpaper.
Primarily, priming creates a smooth and uniform base for your paint or wallpaper, ensuring better adhesion and a more durable finish. It helps to seal porous surfaces, preventing the paint from soaking in unevenly and reduces the number of paint coats needed.
Choosing the right primer is essential; for new drywall or unpainted surfaces, a water-based primer is ideal, while oil-based primers work best for stained or damaged walls. Before applying the primer, make sure to clean the walls thoroughly, patch any imperfections, and sand the surface lightly for optimal results.
Comments